

Intrigued by the cool potential of saving storage space, increasing security, and removing a shin knocker to step over, this new folding trailer tongue hinge adds greater utility to a trailer. This is part of the continuing story of design, and DIY trailer building. To get the full picture, please start with this post on the Economics of DIY projects.
4 Drivers For A Hinged Tongue
- When you store a trailer, the tongue length adds a lot to storage needs. A 5×8 Utility Trailer, for instance, requires about 4 extra feet to store because of the tongue. With a folding trailer tongue, it takes an extra 6 inches instead! That saves a lot of space! For this particular trailer, the tongue is even longer, so the benefit is bigger.
- How do you secure a trailer? There are a ton of products from cheap to expensive. One guy told me, just buy good insurance, because nothing is foolproof. Well, I agree, and the real issue is most systems are additive – meaning you add a lock or chain or other feature. Most of these are easy to overcome with the right hammer or pry bar or saw and a little time. Yet, What If . . . we made it subtractive instead? It is not foolproof, but it creates an element of uncommon inconvenience – perhaps enough to thwart a thief.
- Tongues are shin knockers. They are a hassle to walk around or step over (when not hitched). Get it out of the way.
- OK, this is a little egocentric, but I like things that are a little different and unique. I also like to improve on ideas I have seen, or invent something new to accomplish a task.
Given these 4 drivers, a folding trailer tongue is a good idea. Store the trailer in less space, take the special bolts with you (for security), and it is pretty unique. So, when you want something unique, it is time to build it rather than try to buy it.
The Folding Trailer Tongue
The concept is a tongue that hinges vertically instead of horizontally (like this previous product). The tongue then folds all the way over to lay on top of the bed for storage. In this case, we have incorporated a really long tongue for stability experimentation, for long material handling, as well as to prove the hinge concept.
In proving the concept, there is one special consideration. A longer tongue definitely gives more stress and higher forces at the hinge point. So, to do this right, the new folding trailer tongue design must handle that.
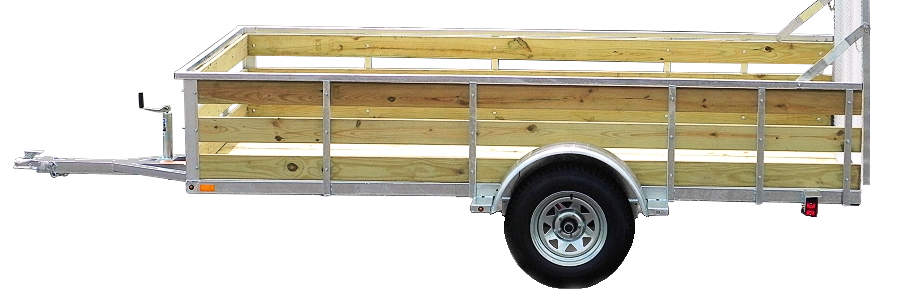
Trailer Tongue in the Extended Position

Trailer Tongue Hinged Back Onto The Trailer Deck

The Tongue Hinge Parts
 The folding trailer tongue can happen by manufacturing a few simple parts. The parts (in the image) are cut from thick, flat metal, laser cut, or water jet cut, then welded to the tongue tube. Bolts hold it all together. Four steel cylinders (tubes) also weld on to guide the bolts (not shown here).
(We chose water jet cutting for our build mostly because it is a quick and reasonably inexpensive way to get good parts.)
For security, I chose long bolts that are not very common. They also require some wrenching. With this new design, the bolts are high stress members so if someone tried to use a rope or something instead, it would probably break. Yeah, I understand, it is not totally secure, but it is probably enough to frustrate an opportunistic thief. If not, there is insurance.
Parts for the folding trailer tongue are in the images above (green, so you can see them), and in the silhouettes of the parts to cut (gray). The assembly with all the parts and the clamps is ready for welding in the photo below.
Why Do They Look So Funny?
 This question is for the Engineer. First, They are tall because the trailer tongue must fold up and over the front trailer frame member. That means the hinge point must be well above the top of the tongue tube.
Second, the “pointy thing” is to allow welding in areas of the tongue beam that have less stress – basically, the mid section on each side of the beam. You can learn more about stress distribution in a beam, like the tongue, in this article about weld engineering. (The article is about spring hanger brackets, but look at the images with stress arrows, and you will see why we want to weld on the beam sides to minimize heat distress.)
Third, the notches let the parts interlock, and align properly to one another. That makes it easier for construction because they are a little like a 3D puzzle.
Finally, the small holes are for bolts, and the larger holes are for weld access. Some call it plug welding, though these holes do not get a full fill of weld.
Note: “Plug welding” through these holes allows the sheet material to connect (weld) to the beams in the center. This makes the connection much more secure, in an area (as in the note above) where beam stresses are lower.
Synthesis did the design with CAD, then a validation with Finite Element Analysis. It is good for a 5000# trailer load – even with that really long tongue! That will certainly do the job for this trailer.
Fabricating
 Putting it all together was a little tricky as you really have to hold all the parts together, in place, at the same time. Good thing there are a lot of various C-Clamps!
To make things align, the bolts are in place, and tight, through the steel tubes to hold things all together for welding.
Also, a thin piece of sheet metal inserts at the joint prior to clamping. That acts as: 1) a shield to keep weld from going over the boundary; and 2) as a stop to be sure all the parts meet at the same plane. You can see the sheet metal in the clamping photo if you look carefully. It is also in the video below.
Note: Extra bolts hold things tight for welding. Then, because the intense heat changes the temper of the bolts, we install new bolts after fabrication for use with the finished trailer.
As with building a trailer frame, we carefully tack everything together, then progressively apply full welds later. Time for cooling between the welding (to avoid heat concentration) helps so that one area will not distort things where we would rather keep them straight.
In the clamp image, you can see some tack welds where the welding process has just begun.
Finalizing The Folding Trailer Tongue Build
For a description of how this all finishes up, enjoy this video. It explains a lot about setting up for welding as well as final fitment so it all works properly.
Some Things We Learned
 One interesting thing we learned is the powder coating extends into the holes more than expected. Because we want a tight-ish fit, we had to drill them out again.
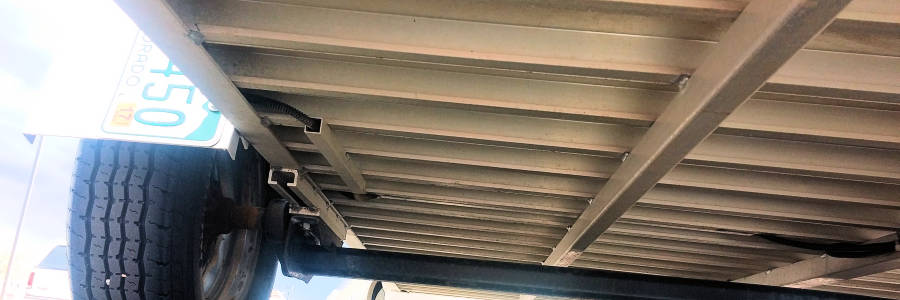
Another point: You Must Protect The Wires! While the tongue tube is a great place to run the wires for lights and brakes, it is really easy to forget them. You must carefully tuck the wires up into the tongue tube as you hinge it down to extend it. I had to replace the first wires I put in there because I was not careful.
Yup, I smashed the insulation on the wires. Bummer. You can see the wires in the image transitioning from the tongue tube into the trailer frame. That is the problem area if the wires do not naturally want to slide into a tube. These images don’t show it, but the wires now have a flexible sheathing as conduit around them to help avoid damage again.
Some things we have to learn the hard way, I guess. Oh well, it all works fine now.
More On The Folding Trailer Tongue . . .
If you want to build one of these for yourself, please let us know. If there is enough interest, then we will make plans available for download in our Mechanical Elements Trailer Plans Store.
Just so you know, it will take some time to draw up the new plans and to write all of the instructions. However, if some of you want us to do it, let us know, and we will take the time to do it.
Next up is the how and why of the unique twin torsion axle suspension design for this trailer. Or you can read more about choosing the correct tongue length.
Finally, if you want an adjustable length tongue – like one length to use normally, and another really short length for storing the trailer, try this article about ways to extend a trailer tongue. There are always more ways to think about things.
UPDATE: – After A Couple Years
No doubt, I like the new folding trailer tongue feature. It is so nice for storing the trailer without the tongue sticking out. Overall it is great feature – but not everything. So, here is the full review of what works, and what I would change if I were to build it again. This second article is definitely worth the read if this kind of folding trailer tongue feature interests you.
Have a Wonderful Day.


Comments