

When building a trailer, there are a bunch of things we want to get right. Here is one. “How To set a trailer tongue properly, and central on the frame“. Intrinsically this is easy to grasp, but maybe not as easy to accomplish. Here are some tricks for doing it — with a straight tongue, and with an “A” style trailer tongue.
While is not necessarily one of the fun things, it is important. Things like Axle Position, and figuring out Proper Tongue Length also fit the category for things that help the trailer tow straight and stable. It is certainly in the category of critical things to get right while building.
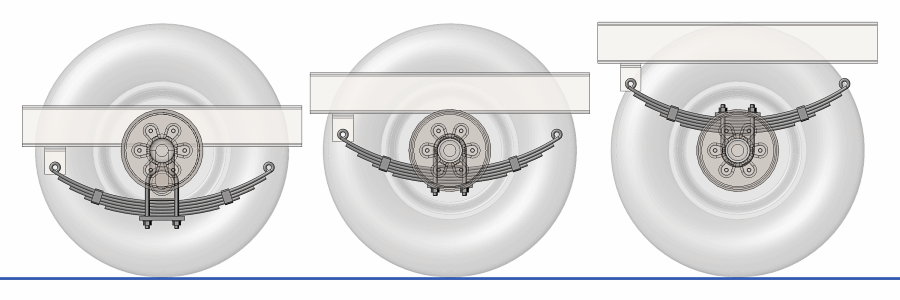
Trailer Tongue Types
Traditionally there are 3 types of trailer tongue configurations:
- A Straight tongue.
- An “A-Frame” tongue.
- A 5th Wheel / Gooseneck.

While they are all somewhat different, there is one thing they all have in common. The hitch point for each tongue type should be set at the centerline of the trailer frame. We will talk about Straight and A-Frame specifically, then the same processes apply for 5th-Wheel and Gooseneck.
Looking from a birds-eye view, draw a (figurative) centerline straight through the center of the frame lengthwise (from the tongue to the tail). The hitch point should be on that centerline. So, when we are building, how do we make sure it gets there?

Why is it important? 1) To help the trailer track straight, and therefore help pull stable. 2) The hitch point and axle orientation have a relationship for straight towing. If one is not straight, towing can become more of a chore.
Ideally we want both the trailer tongue and the axle set straight and true – to the frame as well as to each other. So we recommend carefully setting the tongue first, then place the axle straight based on the hitch point.
Now, we can look at setting the tongue types.
The Straight Tongue
We will start with the easy one. A straight tongue is a central tongue beam, down the middle, to the hitch. If it has diagonal braces (like the image above), place the tongue beam first, then the braces .
Getting this type of trailer tongue to set central is a matter of accurate measurement.
Start at the front of the trailer. Measure from side to side, then mark the middle. For example, if the trailer is 60″ wide, the center is at 30″. Mark at 30″ measuring from one side, then mark again at 30″ from the other side. If the marks are at the same place (which theoretically they will), then you have the center mark. If there is a little gap between the 2 marks, measure again to find the frame center.
Next, make the same marks farther down the frame, preferably at the extent the tongue will reach on the frame.
If the tongue beam is 3″ wide, then make 4 more marks — at 1.5″ on both sides of each center mark. These are now the guides to place the tongue beam. Use the marks to place the beam as exact to center as you can, then clamp it in place.

There is not a big trick, just take care with the measurements. After clamping the tongue beam, double check the placement. Measure from both left and right to make sure the final position is center.
The A-Frame Tongue (aka V-Tongue)
No question, setting the center for an A-Frame trailer tongue is a little more difficult, but let’s make it easy with a couple of tricks. Oh, and we recommend that you measure everything. Do not rely on other beams to be straight or square until you verify that they really are.
1. String Method
The string method is just like it sounds. The concept is to set a string as the centerline, then mount the tongue beams using the string as a guide.
Start by measuring and marking to the center of the trailer frame — just like for the straight tongue above. Mark the front and back frame members in the middle.
Tie a string around the back crossmember, accurately over the center mark.
Next, pull the string forward over the frame and out beyond where the tongue will go. Tie the string to something substantial, and movable (like a chair). Tie it at the right height, then adjust the position of the movable item until the string hangs directly over the center mark on the front beam. The string is NOT tied to the front beam, it is only pulled tight above it.
Use this string now as a reference for setting the tongue beams and the hitch so the center of the hitch is directly under the string.

While this is pretty easy, the trick is working with the string. Set the tongue beams carefully, and make sure the string stays straight over the front beam center mark.
2. Rigid Member for Reference
The rigid member method is a combination of the straight tongue and string methods. In this case, we use a rigid member to clamp on in place of the string. While it is convenient, it does take an additional length of something straight and stiff, like another beam. Make sure it is really straight before using it.
Follow the instructions above to set a straight center trailer tongue, then clamp the beam to the trailer frame. Have it extend out beyond the desired A-frame tongue length. Once set, use the rigid beam to position and set the A-Frame tongue beams.
This temporary straight beam provides a great place to clamp the “A” beams (usually with spacer blocks) while working with them so everything ends up straight.
In practice, the “A-Frame” tongue is usually under or coplanar with the trailer main frame beams. However, to build, it is often much more convenient to set up a trailer tongue with the frame up-side-down. So, by clamping the temporary beam on top of the trailer frame, it is on the bottom as you build. That allows easy use of spacers to support the “A” tongue at the right height while you weld.
Trailer Tongue Extra Notes
1. Don’t rely on material thickness for alignment.
It is a common mistake to just set the tongue on the trailer frame and assume it is correct. Looking at things horizontally (from the side of the trailer), such assumptions can end up with a tongue that slopes down or slopes up compared to the main frame beams. It is an easy mistake to make, because when you are building, it is hard to see an accurate picture of alignment.
To avoid this, measure for accuracy. For instance, set up the trailer frame such that the main frame beams are level in all directions. Use a carpenter’s level and some wedge shims (common for hanging doors in home construction). Make the frame level, then set the trailer tongue members level before welding. Use some thin sheetmetal scraps as shims, if needed, to make the tongue members level.
2. Setting the A-Frame Angle
The typical A-Frame angle is 50°. When building an “A” style tongue, it is often helpful to clamp the A-Frame coupler onto the tongue beams. This helps to assure the tongue beams end up at the correct angle. It also allows you to really make sure the hitch point is central to the trailer frame.

For A-Frame angles that are different (not 50°), or for hitches that do not form the 50° angle, more measurement is required. Also, the angle is not as important because it does not have to fit into the hitch.
While it can be a bit of a hassle, take time to verify all the measurements. Tongue position is important, so take time to do it right.
3. Adjustable Hitch Couplers
 In more recent years, the adjustable hitch has become quite popular. It is a great way to make sure the trailer will connect with a wide variety of tow vehicle heights, but it does take just a little more care in setup for the trailer tongue.
Even when the trailer tongue members are set perfect, it is pretty easy to skewank the hitch. We recommend using methods like clamping a bar (like a piece of angle iron) to either side of the channel and using those back to the trailer frame with measurements to the center of the frame. Tricks to make sure the channel is straight and true.
Make sure it is vertical, and not twisted in any direction. Please don’t eye-ball the adjustable channel into place, and don’t use the cut end(s) of the tongue beams for placements. These adjustable hitches are a really cool devise, but they need orientation in all 3 dimensions so they look and work best.
Image shows a product from Bulldog. They are not a sponsor, but we like their products.
4. Take Your Time
By taking a little time to measure carefully and make the fine adjustments, you can set the tongue perfectly on the trailer frame. It is worth a little extra time for double checking measurements because it will pay the dividends for as long as you have the trailer.
More Trailer Tongue Articles
This is just one article of many that we have written on the topic of trailer tongues. More good reading is in the article on “What Is The Right Trailer Tongue Length?”
Then there are a couple good articles about ways to reduce the tongue for easier trailer storage. Try this one about a folding tongue product you can buy, then this other article with a better approach for a hinged tongue (and, of course, the follow up article about What I would do different when doing it again). Finally, we have a good article about how to build a telescoping tongue so you can adjust the length – long, standard, and slide in for storage.
If you want to see what happens when you set a trailer tongue too weak, we have two good articles about failures. The first is a tongue that bent, and how we recommend to fix it. The second article is about an aluminum trailer tongue that broke (fractured). Both stories from customers.
Enjoy the articles, and Good luck as you set your trailer tongue right.


Comments