

We see them around, on the highway heading for a weekend away. They always look so cool and just beg you to find your own adventure. Just a cute little teardrop camper set to take someone for a great vacation.
While this customer story is about building a unique and beautiful teardrop camper, it’s also about and awesome family project. DIY at its best! They built some good memories in the process of setting the stage to make even more. (On a personal note from The Mechanic, I lost my son, so I hang on dearly to the awesome memories of working with him in the shop. This story speaks to me, and I hope anyone with the opportunity takes it, and makes the most of it, like I see in this story.)
This teardrop is on a chassis who’s plans came from right here at Mechanical Elements. We love to see it. So, if you’re thinking about a teardrop camper, we hope this is an inspiration.
The finished product is beautiful.
First, Thank You. We really appreciate all the photos along with the story. There are several, so scroll down the page to enjoy them.
This story comes from “ScottA” via our Customer Story Submission Form. We would love to hear your story too. Here is Scott’s story in his own words.
Customer Story:
A Teardrop Camper Build – from “ScottA”
This project started when my daughter, graphic designer, mentioned to me that she was looking for a new welding project to work on with me. Her and her husband like to camp so I suggested building a teardrop camper. So, we started by doing some research to determine if we should buy the trailer platform or build it.
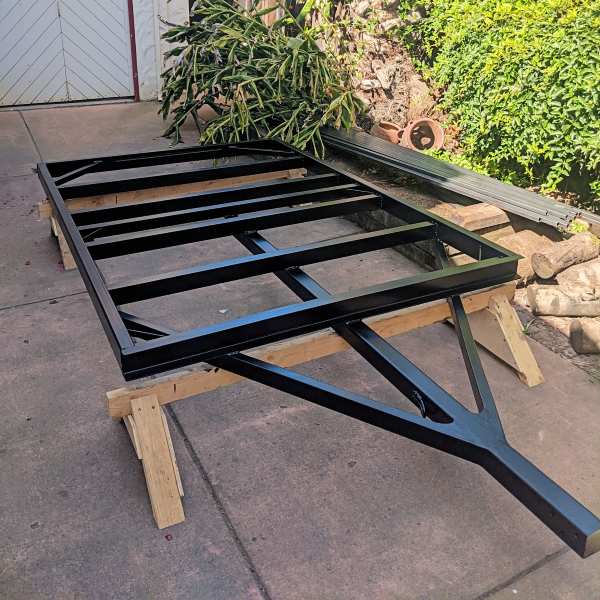
We decided to build it and purchased the 5×8 utility trailer design for Torsion Axle plans from Mechanical Elements for the camper’s platform. We increase the width of the trailer by 5″ so the camper could accommodate a queen size mattress and went with Timbren for the axle-less spindles. The rest of the trailer construction is per the plans.
The camper (cabin) frame is built with 1″ square tubing and the teardrop shape is accomplished by pie cutting the tubing. Exterior wood paneling is 1/4″ plywood with quarter sawn sapele veneer. The finish is epoxy resin.
Inside is a 54 amp hour lithium battery to run lights, and USB charging ports and we installed a couple solar panels on the roof to help keep the battery charged. The back hatch opens up for access to a kitchen galley.
We have taken the trailer on a few road tests and are really happy with how it performs. So far the project has taken about 1.5 years. We will be taking it to the DMV to get it registered in the coming weeks, and then we should be ready to hit the road with it!

ScottA
Thank You For The Story
It is always exciting to see the wonderful things people build starting with Mechanical Elements trailer plans. Thank you very much for sharing the story so others can also be inspired. This is a great example of customizing to achieve the desired end result. Rock on.
Truly, this trailer looks great. While I really like the look, it’s the DIY process that makes me excited. So great to see the process, and to hear again that in DIY things normally don’t happen overnight.
Thank you again for sending the photos and the story to go with them. Enjoy the new and improved, nicely aerodynamic trailer.
Photos of Building the Teardrop Camper
More photos that came with the story are here in order of the build process. These photos tell a wonderful story all by themselves. (These photos are cropped and sized from the originals to fit the web size and to minimize page load time.) Enjoy.


There is one thing in the build (notice from the photos) that kind of surprised me. The actual deck material inside the trailer appears to have gone in late in the process. I guess I did not think too much about build order until I did the design to fill a request for a light duty camper chassis. I always learn so much from the projects of our readers. Anyway, I think this is a really great project. Thank you.


Comments